How to Create Database Replication in Sql Server
Creating custom SQL Server replication for read-only databases
Let's discuss SQL Server replication using T-SQL. And consider the general algorithm for replicating tables in one direction from source to destination.
![]()

Quite often there's a need to create a read-only replica of a SQL Server database. This might be required, for example, for the purpose of separating analytical and operative tasks. The first cause high load on databases and in order to reduce it, the replica of the primary database is created to perform analytical read-only queries.
Usually, these read-only replicas can be created with in-built DBMS tools:
- Log Shipping
- SQL Server Replication
- AlwaysOn Availability Groups.
But what if you don't need the en t ire database but only a few tables from it? In this case, you can create replication by yourself. And as long as data sampling is the main goal, database replication in one direction (master-to-slave) would be enough. Several methods including SSIS and .NET can be used to perform that kind of replication.
In this article, we will use the JobEmpl recruiting service database to demonstrate how to create database replication in the master-to-slave direction using T-SQL.
Creating SQL Server replication in one direction using T-SQL
To start with, let's describe the main principle and the algorithm of this replication. During every iteration, we need to compare the data in the selected tables between the Source and the Target databases. This means that we need to enter a unique surrogate key to compare the tables. To speed up the comparison process, we will also need to create an index on that key. And adding a calculated field for every replicated table that calculates CHECKSUM for every row will also be required.
It is also important to pick fixed portions of data, for example, a certain number of rows at a time (per iteration).
Thus, we need to perform the following steps:
- On the source tables, create a REPL_GUID column and a unique REPL_GUID index on it to enforce a one-to-one relationship between source and destination tables. You should also create a calculated CheckSumVal column that will calculate the CHECKSUM value for every row.
- Create a new destination database named Target.
- Synchronize schemas of the replication tables across the Source and Target databases and remove all references to nonexistent objects.
- Disable foreign keys for the Target database.
- Run the replication and monitor how many rows differ between the Source and Target databases.
Let's now review each step in detail using the JobEmpl database that was created for hiring employees.
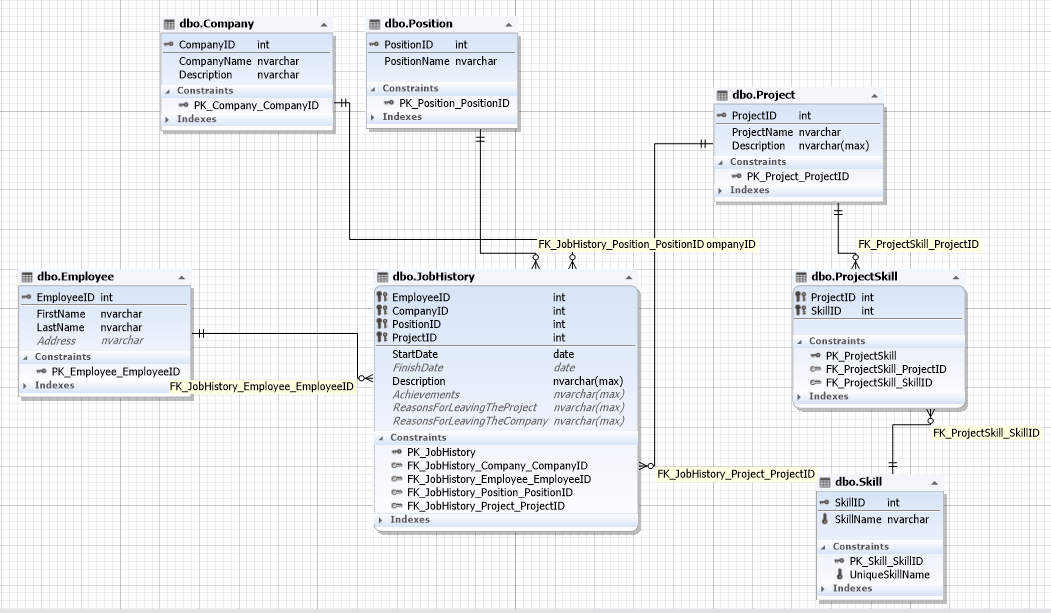
We only need to replicate the Employee and the JobHistory tables.
Then, the 1st step of the mentioned algorithm can be performed with the help of the following script.
From the script, you can see that it has to be run on the source JobEmpl database and you should specify the source database and the schema in @src and @sch variables accordingly. The @sql variable is required for building dynamic SQL, meanwhile, @name is needed for saving the name of the replicated table.
First, we collect the replicated tables names into the temporary #tbl table. Next, we go through every table name with a cursor and fetch the table name into the @name variable. After that, for every table, a list of columns that are not the IDENTITY type is formed and the result is inserted into the @listcols variable with the "+" sign.
It's worth mentioning that every table name is, at first, converted with the CAST function to NVACHAR(MAX) type and then the COALESCE function ([<ColumnName>], N'') is used. It's done to form a single string from all the column values for every row.
Next, the calculated CheckSumVal field, the REPL_GUID field, and its unique indREPL_GUID index are created.
In our case, we got the following script.
You can later delete the created tables and indexes from the databases with the help of the following scripts.
The replicated tables are also here, and for each of them the indREPL_GUID index, as well as REPL_GUID and CheckSumVal columns, get deleted.
In our case, the following T-SQL code was created.
Let's now create a new JobEmplRead database for receiving data according to the 2nd step of the algorithm, mentioned above. Then, we synchronize schemas for the replicated tables. To perform synchronization, use the DbForge Schema Compare tool: select JobEmpl as the data source and jobEmplRead as the data target.
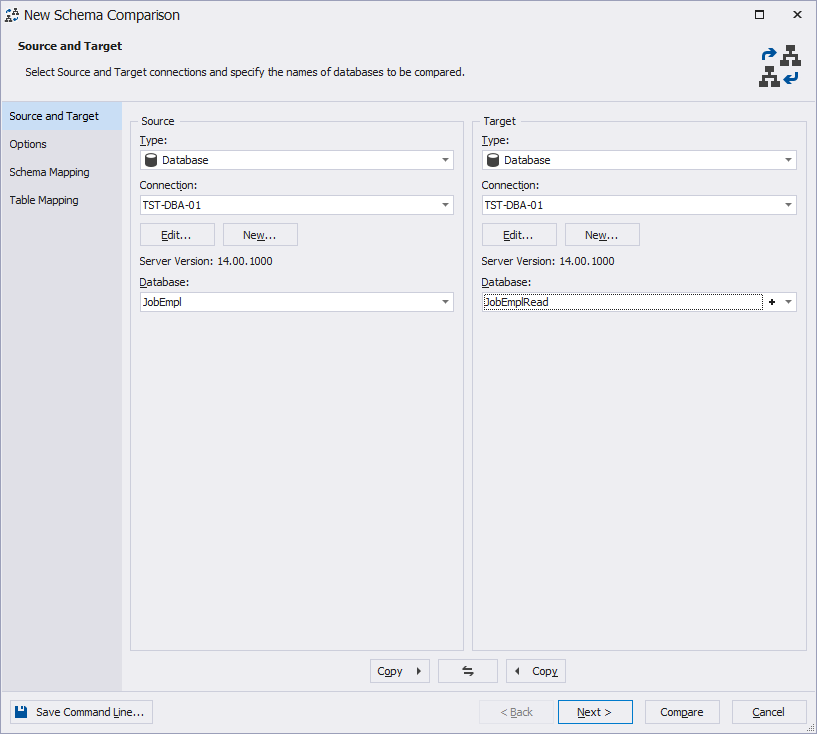
Then press the Compare button. Once the metadata creation process for the comparison is done, select the required tables and start configuring the database synchronization process.
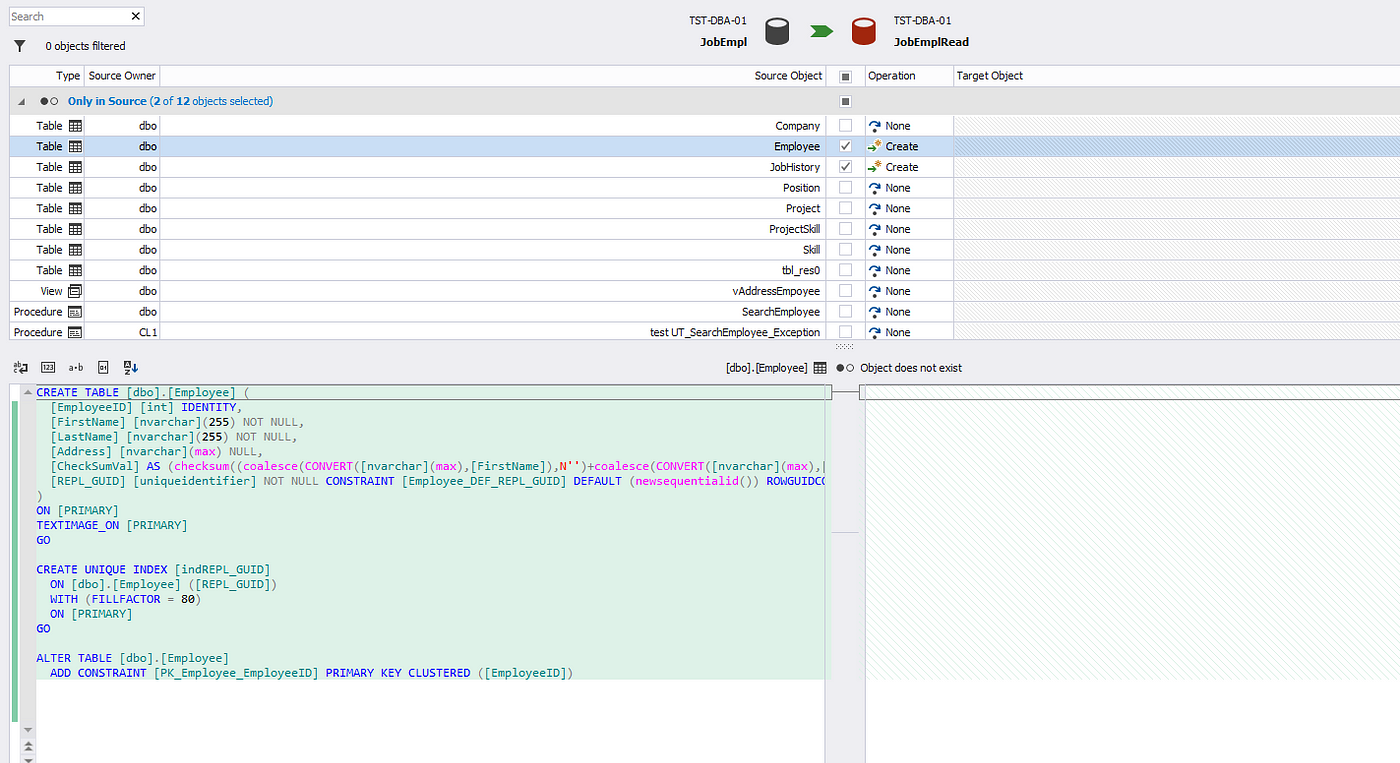
Next, we select the default value — script generation.
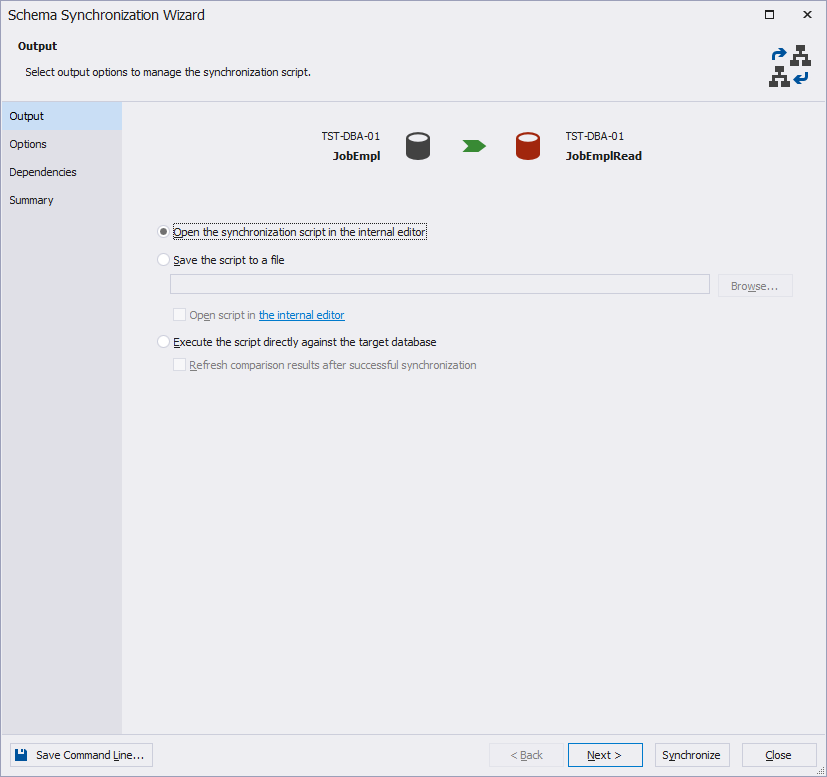
Let's now clear the backup creation option.
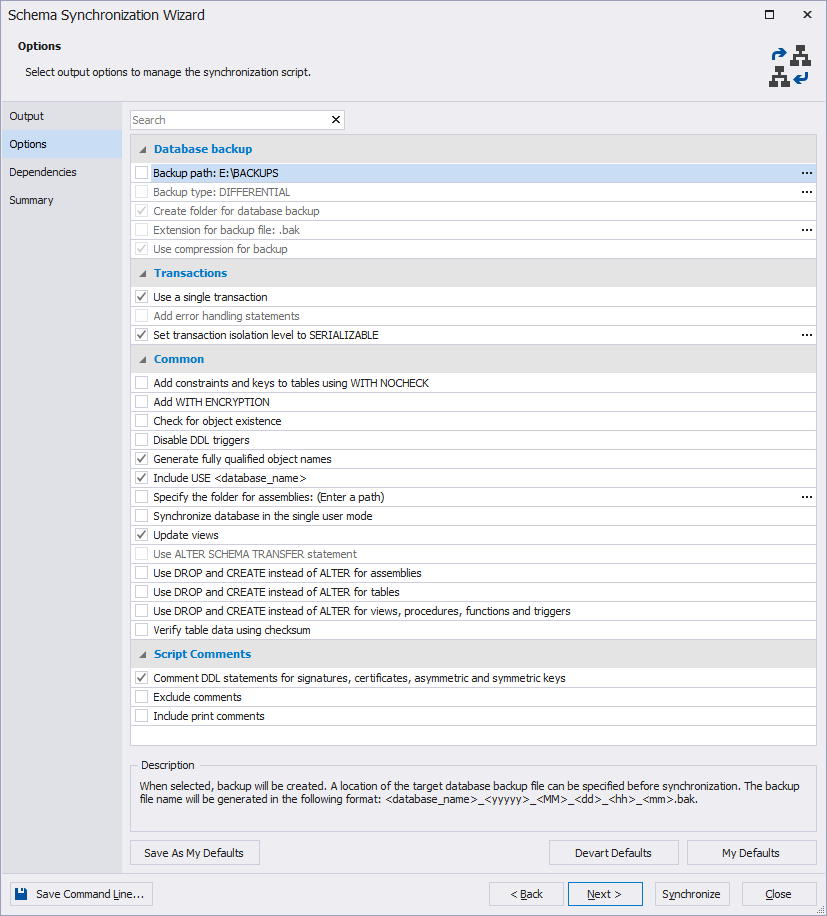
Next, we uncheck all the dependencies as we don't need to create other objects. And we will later delete foreign keys manually in a generated schema synchronization script.
Now press the Synchronize button and ignore the warnings on the Summary tab.
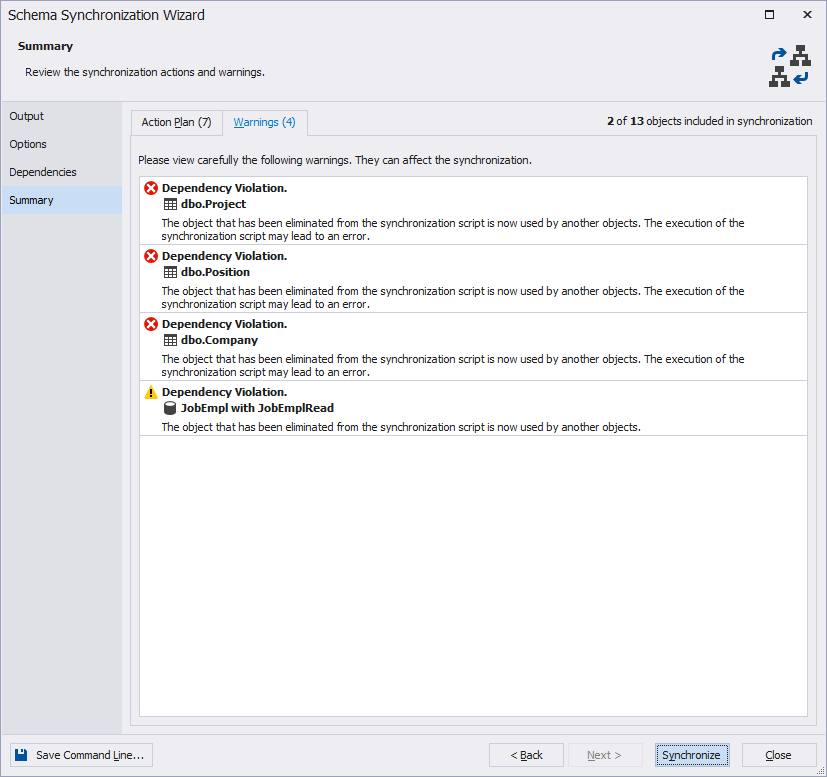
Delete the following foreign keys in the generated script:
- FK_JobHistory_Company_CompanyID
- FK_JobHistory_Position_PositionID
- FK_JobHistory_Project_ProjectID
We need to do this because we didn't transfer the Company, Position, and Project tables. As a result, we got a script for moving replicated schema tables.
Run this script in the JobEmplRead database.
Thus, we've completed step 3 of our algorithm: synchronized tables schema across the JobEmpl and JobEmplRead databases and deleted all references to nonexistent objects.
Let's use the following script for monitoring.
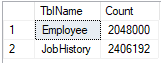
Here we have FULL OUTER JOIN statements creation and the return of the tables list and the number of distinctive rows, including nonexisting and lacking rows.
In our case, we get the following result.
The following script was generated for comparison.
It's worth noting that to reduce blockings, the transaction isolation level is Dirty Read.
Let's unite the 4th and the 5th steps of our algorithm into the following single script.
First, all foreign keys for the replicated table are disabled in the JobEmplRead database. Then with the MERGE statements data is copied in portions. In our case, we have 100 000 rows per iteration. This script comprises a single iteration and executes the following T-SQL code.
This script should be run automatically at an interval specified in advance. For example, it can be run every minute or even more frequently depending on the analytics needs.
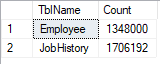
The number of distinctive rows has to be smaller after several iterations.
Remember that to enable foreign keys in the disabled tables you should run the following script.
In our case, the following script will be generated and executed.
ALTER TABLE [JobHistory] CHECK CONSTRAINT [FK_JobHistory_Employee_EmployeeID]; Keep in mind that you can't enable foreign keys on the replicated tables while the replication is running until all data is copied.
Conclusion
We have reviewed one of the ways to implement the process of replicating tables in one direction from the source to the destination.
This approach and scripts can be applied to any database. But of course, those scripts have to be modified depending on the specifics of the replicated tables. For example, modification might be required if the tables have calculated fields.
SQL Complete was the main tool to help me build those scripts. The tool also allows code formatting as well as renaming objects and all their references.
How to Create Database Replication in Sql Server
Source: https://towardsdatascience.com/creating-custom-sql-server-replication-for-read-only-databases-e25953d7ff82